Published on May 25, 2025
Last updated: May 25, 2025 · ⏱ 4 min read
How to Start Seeds Indoors Without a Greenhouse
Why Start Seeds Indoors?
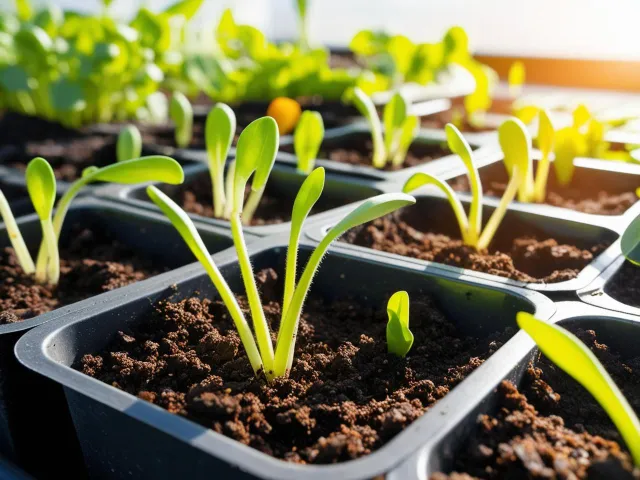
Starting seeds indoors offers gardeners a head start on the growing season. This practice allows you to cultivate a variety of plants that may not thrive outdoors until the risk of frost has passed. By starting seeds indoors, you can enjoy a longer growing season, leading to a more abundant harvest. Additionally, growing your plants from seeds can be incredibly fulfilling, as you witness the entire life cycle of your plants from germination to maturity.
Choosing the Right Containers
Selecting appropriate containers is one of the first steps in starting seeds indoors. You have several options, ranging from traditional seed trays to biodegradable pots. Seed trays are ideal for starting multiple seeds at once and are often designed with drainage holes to prevent overwatering. Biodegradable pots, such as peat pots or coconut coir pots, allow seedlings to be transplanted directly into the garden without disturbing their roots. This minimizes transplant shock and promotes healthy growth.
When choosing containers, ensure they are clean and free from any contaminants. If you’re reusing old pots, wash them thoroughly with a mild bleach solution to kill any lingering pathogens. Make sure that whatever container you choose has adequate drainage, as proper water management is crucial during the germination phase.
Selecting the Right Potting Mix
The potting mix you choose plays a critical role in the success of your seedlings. Regular garden soil can be too dense and may harbor pests or diseases. Instead, opt for a high-quality seed starting mix, which is typically lighter and more sterile. These mixes are designed to retain moisture while providing good aeration, essential for healthy root development.
Look for a mix that contains ingredients such as peat moss, vermiculite, and perlite. These components create an ideal environment for seed germination by ensuring proper drainage and preventing compaction. You might also consider pre-fertilized mixes that provide essential nutrients to your seedlings during their early growth stages.
Understanding Light Requirements
Light is a critical factor in starting seeds indoors, as it directly affects the photosynthesis process. Most seedlings require 12 to 16 hours of light each day for optimal growth. Natural sunlight is the best source of light, but if you don’t have a suitable south-facing window, you may need to invest in grow lights. LED or fluorescent grow lights simulate sunlight and can be adjusted to provide the right intensity and duration for your seedlings.
When using grow lights, keep them about 2 to 4 inches above the seedlings and adjust the height as they grow. This ensures that the plants receive adequate light without getting burned. Monitor your seedlings for signs of legginess, which indicates they are not receiving enough light. If your plants appear stretched or weak, consider increasing their exposure to light.
Maintaining Optimal Temperature and Humidity
Temperature and humidity are other critical factors in the successful germination of seeds. Most seeds germinate best in temperatures ranging from 65°F to 75°F (18°C to 24°C). Using a seedling heat mat can help maintain a consistent temperature, especially in cooler months. These mats provide gentle warmth from below, speeding up germination and promoting stronger seedlings.
Humidity is also important, as it helps keep the seedlings from drying out. Cover your seed trays with a humidity dome or plastic wrap until the seeds sprout. This will create a mini greenhouse effect, trapping moisture and warmth. Once the seedlings begin to emerge, remove the cover to allow for air circulation and to prevent mold growth.
Watering Your Seedlings
Proper watering is essential for the health of your seedlings. Overwatering can lead to root rot, while underwatering can cause seedlings to wilt and die. The key is to keep the potting mix consistently moist but not soggy. A good rule of thumb is to water when the top inch of the soil feels dry to the touch.
Using a spray bottle or a watering can with a fine spout can help you control the amount of water you give your seedlings. Water gently to avoid displacing the seeds or damaging the delicate roots. If you notice water pooling at the bottom of your trays, it’s a sign that you may have overwatered, so adjust your watering schedule accordingly.
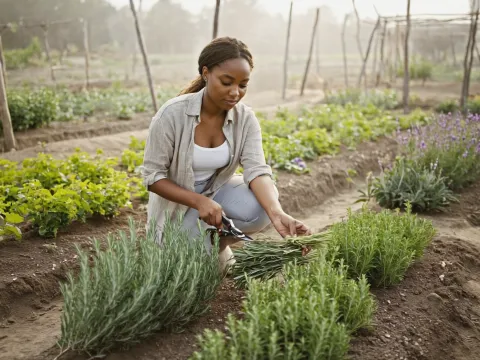
Thinning Out Seedlings
Once your seedlings have developed their first set of true leaves, it’s time to thin them out. This process involves removing the weaker seedlings to give the stronger ones room to grow. Thinning is crucial, as overcrowded seedlings can compete for light, nutrients, and water, leading to stunted growth.
To thin seedlings, gently snip the weaker plants at the soil line with scissors. Avoid pulling them out, as this can disturb the roots of nearby seedlings. Aim to leave the healthiest plants spaced according to their specific needs, which you can find on the seed packet or in gardening resources.
Transplanting Seedlings Outdoors
After your seedlings have grown strong and developed several sets of leaves, it’s time to consider transplanting them outdoors. Before doing so, it’s important to harden off your seedlings. This process helps them acclimate to outdoor conditions, reducing the risk of shock. Start by placing your seedlings outside in a sheltered area for a few hours each day, gradually increasing their exposure to sunlight and wind over a week or two.
When it’s time to transplant, choose a cloudy day or do it in the evening to minimize stress on the plants. Prepare your garden bed by loosening the soil and adding organic matter if needed. Carefully remove the seedlings from their containers, taking care not to damage the roots, and plant them at the same depth they were growing indoors. Gently firm the soil around the base and water thoroughly to help them settle in. With proper care, your seedlings will adapt quickly and continue to thrive in their new environment.

Written by Soufyan from GrowToGrub
Soufyan is a gardening educator and founder of GrowToGrub. Through simple guides, easy recipes, and practical life hacks, he helps everyday growers turn small spaces into sustainable, delicious, and chemical-free living.