Published on May 22, 2025
Last updated: May 22, 2025 · ⏱ 4 min read
Clean Your Microwave with Just a Lemon (No Scrubbing!)
The Challenge of Microwave Cleaning
Cleaning a microwave can often feel like an arduous task. Many people avoid it, letting crumbs and splatters accumulate over time. The thought of scrubbing the interior, especially when food has dried and hardened, is less than appealing. But what if there was a way to clean your microwave that required minimal effort and no scrubbing? This is where the natural cleaning power of lemons comes into play, providing an effective solution that not only cleans but also eliminates odors.
Why Choose Lemon for Cleaning?
Lemons are widely known for their cleaning properties, thanks to their high acidity and antibacterial characteristics. When used in cleaning, the citric acid in lemons acts as a powerful degreaser, breaking down grime and stains. Additionally, lemons have a refreshing scent that can neutralize unpleasant odors, making your kitchen smell fresh and inviting. Unlike commercial cleaners that may contain harsh chemicals, lemons offer a natural alternative that is safe for your family and the environment.
Preparing Your Microwave for Cleaning
Before you start cleaning your microwave with lemons, it’s important to prepare the appliance. First, remove any food items or containers from inside the microwave. Take out the turntable if your microwave has one, as this will allow you to clean all surfaces thoroughly. Wipe down any large food particles or spills with a damp cloth or paper towel. This initial step ensures that the lemon cleaning method will be most effective and that you won’t be working around larger messes.
The Lemon Cleaning Method
Using lemons to clean your microwave is both easy and effective. Follow these simple steps to harness the cleaning power of this citrus fruit:
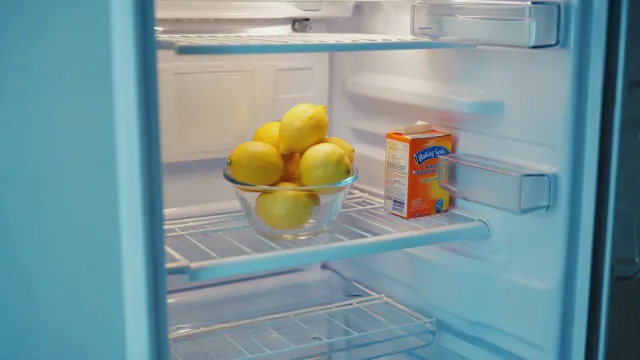
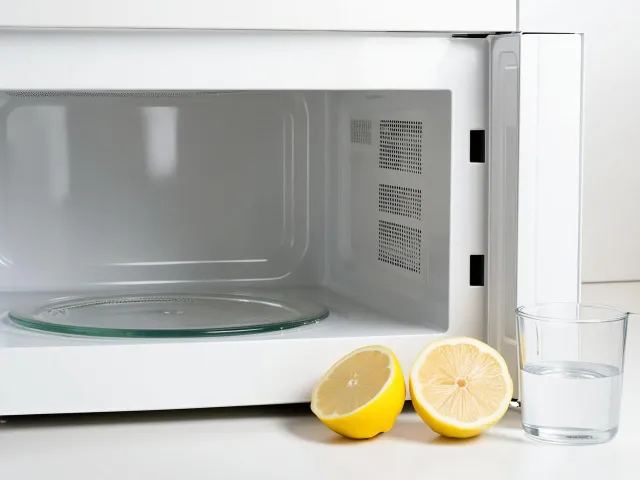
1. **Gather Your Supplies**: You will need one or two lemons, a microwave-safe bowl, and water.
2. **Prepare the Lemon Solution**: Cut the lemons in half and squeeze the juice into the bowl. If you’re using two lemons, you can cut them into quarters for a stronger solution. Add about a cup of water to the bowl, mixing it with the lemon juice.
3. **Microwave the Solution**: Place the bowl in the microwave and set it to high for about 5 minutes. The water will heat up and create steam, which will loosen grease and food particles stuck to the microwave walls.
4. **Let it Sit**: Once the timer goes off, leave the bowl inside the microwave for an additional 5 minutes without opening the door. This allows the steam to continue working on the stains and odors.
5. **Wipe Down the Interior**: Carefully remove the bowl (it will be hot!) and use a clean cloth or sponge to wipe down the interior surfaces of the microwave. The steam will have softened any residue, making it easy to wipe away.
6. **Clean the Turntable**: Don’t forget to wash the turntable separately with warm, soapy water or in the dishwasher if it’s dishwasher-safe. This ensures every part of your microwave is clean and fresh.
Benefits of Using Lemon for Microwave Cleaning
This method of cleaning your microwave with lemons offers numerous benefits. Firstly, it’s incredibly efficient. The steam generated from the lemon and water mixture penetrates tough stains, making them easier to clean without scrubbing. Secondly, this technique is entirely natural and eco-friendly. You won’t need to rely on chemical-laden products that can be harmful to your health and the environment.
Moreover, using lemons not only cleans but also deodorizes your microwave. The fresh scent of lemon can neutralize any lingering odors from previous meals, leaving your microwave smelling clean and inviting. Lastly, this method is cost-effective. Lemons are relatively inexpensive, and you likely have water on hand, making it a budget-friendly cleaning solution.
Additional Tips for Maintaining a Clean Microwave
While the lemon cleaning method is highly effective, maintaining a clean microwave requires some additional practices. Here are some tips to help keep your microwave looking fresh:
1. **Cover Your Food**: When using the microwave, cover dishes with a microwave-safe lid or microwave-safe wrap to prevent splatters. This simple step can significantly reduce the mess inside your microwave.
2. **Wipe Spills Immediately**: If you notice any spills or splatters, take a moment to wipe them up right away. The longer they sit, the harder they become to clean.
3. **Regular Cleaning Schedule**: Set a regular schedule for cleaning your microwave. Doing it weekly or bi-weekly can help maintain cleanliness and prevent buildup.
4. **Use Baking Soda for Tough Stains**: For stubborn stains that don’t come off easily, consider using a paste of baking soda and water. Apply it to the stained area, let it sit for a few minutes, and then wipe it off with a damp cloth.
Conclusion
Cleaning your microwave doesn’t have to be a dreaded chore. With the simple and effective lemon cleaning method, you can achieve a sparkling clean microwave without the need for scrubbing. This natural approach not only eliminates stains and odors but also adds a refreshing scent to your kitchen. By incorporating some preventive measures and establishing a regular cleaning routine, you can keep your microwave looking and smelling great for years to come.
FAQs: Natural Microwave Cleaning

Written by Soufyan from GrowToGrub
Soufyan is a gardening educator and founder of GrowToGrub. Through simple guides, easy recipes, and practical life hacks, he helps everyday growers turn small spaces into sustainable, delicious, and chemical-free living.